2009 Map (that you want to see)

Here how our 2009 transoceanic cable map. To order for your own house/office wall, click map above. To view historical illustrated, find it at boingboing and;

<Above> 2009 Global Internet Map, if you or your company to nerd want to know physical connectivity (other than just ping, route etc) get it here. Also available for your wallpaper.

Posted by
Unknown
11:48 AM
0
comments
Enable Google Contact Sync Without an iPhone or iPod Touch [Mac OS X Leopard]
Sent to you by Rafi via Google Reader:
via Lifehacker by Gina Trapani on 5/28/08
Mac OS X only: Earlier today we reported that Mac OS's latest update to 10.5.3 included Google contact syncing to Address Book—if you've connected an iPhone or iPod touch to your Mac, that is....
Things you can do from here:
- Subscribe to Lifehacker using Google Reader
- Get started using Google Reader to easily keep up with all your favorite sites
Posted by
Unknown
6:41 PM
1 comments
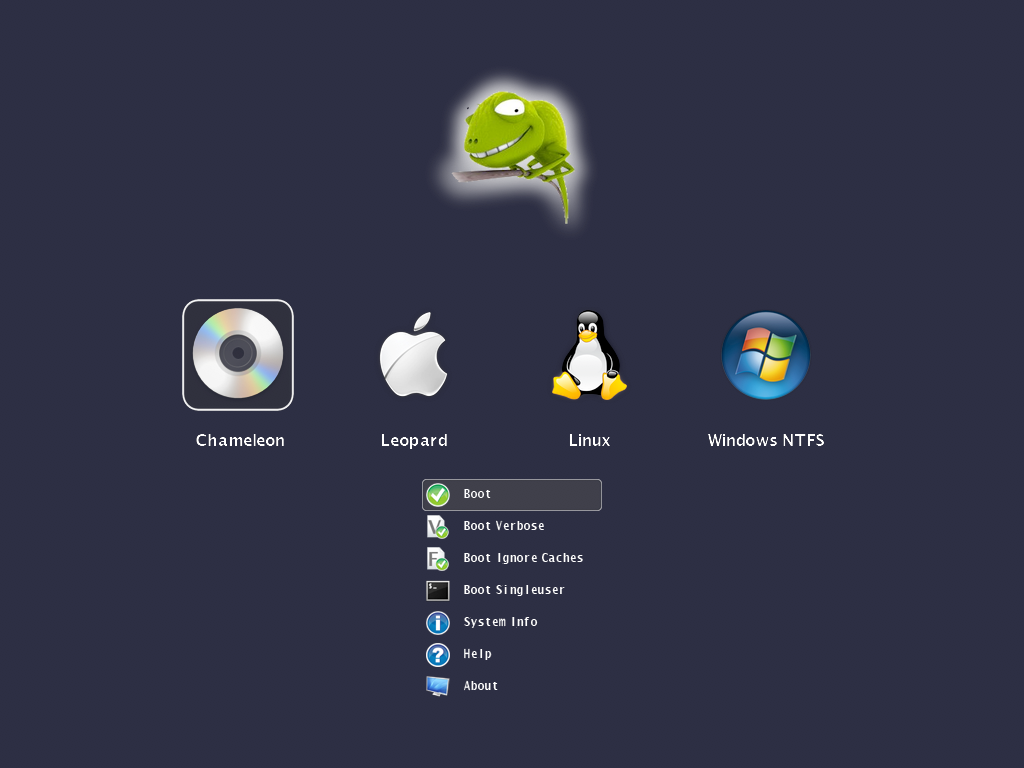
New Chameleon Announced!
Great feature, worth trying...
Sent to you by Rafi via Google Reader:
via InsanelyMac News on 2/4/09
Zef posted this on the Chameleon site today:
QUOTE
How do you mean customizable?You can replace all the images, the icons, the funny chameleon artwork, the fonts. Also you can set the background color, the transparency levels, the dimensons, positions of certain user interface elements. The image resource files can be either embedded into the booter or can be loaded at runtime by using a special .plist style configuration file.
Doesn't embedding the images makes the boot loader too large?
With the current set of icons, images, fonts embedded, the booter size is about 300k. Without embedding the resources you will get about a 110k large booter. The maximum size of the booter is 392704 bytes (383.5k).
What image formats are supported?
The booter has built-in support for true color 24 bit PNG images with 8 bit transparency layer. We wanted to offer a high quality lossless image format which can be created, edited with many graphics applications across all platforms.
What if I still prefer the text mode interface?
We can't switch between text mode and graphical mode at the moment after the booter has been started, but you still have a Boot.plist option to disable the GUI. This way you get the well known text based Darwin boot menu.
Ok, this is all fine. Can I see something?
Sure! Click below on the pictures in the gallery to see these shots in full size.
Can I have it now?
No. Please don't ask for it as you will get it when it's released.
What's next? Do i have to wait for next christmas ;-)?
We're still fighting with issues and polishing the code but freezed the features. So instead of staying quiet, we're going to reveal other features in the next post on this week.
Image Gallery
Countdown timer using a progress bar.
http://www.insanelymac.com/forum/index.php?act=attach&type=post&id=44517
You can select from many partitions across multiple disks. Even the foreign OS types are detected properly on GPT formatted disks as well.
http://www.insanelymac.com/forum/index.php?act=attach&type=post&id=44518
You can choose from the typical boot options available for native HFS partitions.
http://www.insanelymac.com/forum/index.php?act=attach&type=post&id=44519
This is how the video mode list will be rendered as a transparent window surface over the icons.
http://www.insanelymac.com/forum/index.php?act=attach&type=post&id=44520
Optionally you can replace the grey apple logo with a custom transparent image.
http://www.insanelymac.com/forum/index.php?act=attach&type=post&id=44521
Doesn't embedding the images makes the boot loader too large?
With the current set of icons, images, fonts embedded, the booter size is about 300k. Without embedding the resources you will get about a 110k large booter. The maximum size of the booter is 392704 bytes (383.5k).
What image formats are supported?
The booter has built-in support for true color 24 bit PNG images with 8 bit transparency layer. We wanted to offer a high quality lossless image format which can be created, edited with many graphics applications across all platforms.
What if I still prefer the text mode interface?
We can't switch between text mode and graphical mode at the moment after the booter has been started, but you still have a Boot.plist option to disable the GUI. This way you get the well known text based Darwin boot menu.
Ok, this is all fine. Can I see something?
Sure! Click below on the pictures in the gallery to see these shots in full size.
Can I have it now?
No. Please don't ask for it as you will get it when it's released.
What's next? Do i have to wait for next christmas ;-)?
We're still fighting with issues and polishing the code but freezed the features. So instead of staying quiet, we're going to reveal other features in the next post on this week.
Image Gallery
Countdown timer using a progress bar.
http://www.insanelymac.com/forum/index.php?act=attach&type=post&id=44517
You can select from many partitions across multiple disks. Even the foreign OS types are detected properly on GPT formatted disks as well.
http://www.insanelymac.com/forum/index.php?act=attach&type=post&id=44518
You can choose from the typical boot options available for native HFS partitions.
http://www.insanelymac.com/forum/index.php?act=attach&type=post&id=44519
This is how the video mode list will be rendered as a transparent window surface over the icons.
http://www.insanelymac.com/forum/index.php?act=attach&type=post&id=44520
Optionally you can replace the grey apple logo with a custom transparent image.
http://www.insanelymac.com/forum/index.php?act=attach&type=post&id=44521
Hi Res images are available on their blog. IT IS NOT OUT YET SO DON'T BOTHER ASKING
Things you can do from here:
- Subscribe to InsanelyMac News using Google Reader
- Get started using Google Reader to easily keep up with all your favorite sites
Posted by
Unknown
1:03 AM
0
comments
Howto update to 10.5.6
Update 10.5.6 Combo
(translate from this France tutorial(using Google Translate), thanks to Tekikou). My system was 10.5.3 version, and with this tutorial, everything works perfect.
a) Install Disabler.kext using OSX86Tools.
b) Install Bootloader and DSDT:
First, you need to install an update to your Bootloader PCEfi_V9 here distributed by Trauma23: [Download]
Once downloaded, you open it, then you have something like this:
Double click Chameleon_v1012.pkg and follow the instructions on the screen.
Once installed Chameleon completed, we need to patch the DSDT, therefore double-click on DSDTPatcherGUI_1.0 2 and DSDT Patcher GUI. A window will appear:
Check as in the picture, and put in place Macintosh HD, the name of the hard disk where you installed Mac OS X and then click RUN DSDT Patch.
Before you go to the suite, please Reboot your computer to make sure that the bootloader was installed correctly.
c) Installing the combo update 10.5.6:
Download the update from the server COMBO Apple.
1) You launch the terminal.
Download this script and place it at the root (/) of your drive.
Open the terminal and type:
Enter your password and then type:
2) Run then updated and you'll get a window like this:
Once the update is complete, do not restart!.
3) Go into the terminal, open new terminal and type:
(we will ask you your password, enter it, do not worry when you type the text is not displayed)
4) Then type:
5) Find the line: /System/Library/Extensions/Dont Steal Mac OS X.kext
6) Replace with: /System/Library/Extensions/dsmos.kext
7) Stay press the Control + O. Then press ENTER.
8) Stay press Control + X.
9) Type "exit"
10) Close the terminal.
(translate from this France tutorial(using Google Translate), thanks to Tekikou). My system was 10.5.3 version, and with this tutorial, everything works perfect.
a) Install Disabler.kext using OSX86Tools.
b) Install Bootloader and DSDT:
First, you need to install an update to your Bootloader PCEfi_V9 here distributed by Trauma23: [Download]
Once downloaded, you open it, then you have something like this:

Once installed Chameleon completed, we need to patch the DSDT, therefore double-click on DSDTPatcherGUI_1.0 2 and DSDT Patcher GUI. A window will appear:

Before you go to the suite, please Reboot your computer to make sure that the bootloader was installed correctly.
c) Installing the combo update 10.5.6:
Download the update from the server COMBO Apple.
1) You launch the terminal.
Download this script and place it at the root (/) of your drive.
Open the terminal and type:
CODE
sudo-s
Enter your password and then type:
CODE
sh / pmkiller.sh
2) Run then updated and you'll get a window like this:

3) Go into the terminal, open new terminal and type:
CODE
Sudo-s
(we will ask you your password, enter it, do not worry when you type the text is not displayed)
4) Then type:
CODE
sudo nano / System/InstallAtStartup/scripts/1
5) Find the line: /System/Library/Extensions/Dont Steal Mac OS X.kext
6) Replace with: /System/Library/Extensions/dsmos.kext
7) Stay press the Control + O. Then press ENTER.
8) Stay press Control + X.
9) Type "exit"
10) Close the terminal.
Reboot and cross your fingers 
feed me! hello.igetconnection.com
Posted by
Unknown
11:08 AM
0
comments
Labels: mac
Syncback: Sync & Backup your files
If you have NAS or backup system in office & at home, best application to sync/backup your precious files, documents, pictures & videos is using Syncback.
It's freeware & for Windows system.

P/S: For D-Link Nas-323 & Mac user (like me); you can follow this guide and if you're using transmission; follow this guide.
It's freeware & for Windows system.
P/S: For D-Link Nas-323 & Mac user (like me); you can follow this guide and if you're using transmission; follow this guide.
Posted by
Unknown
1:40 PM
0
comments
Social Network: Alert me!
For those addicted to Social Network (Facebook, Twitter, Flickr etc) you should have this application in your Computer Desktop. AlertThingy will update you instantly what happen to your friends. What you need is to get Adobe Air installed, there various applications for your needs.

The same alert app is feedalizr (i used this one... why? no specific reason)
Posted by
Unknown
11:58 AM
0
comments
Bagaimana Sync Calendar: Mobile + Google Calendar + Outlook(Office Calendar) + iCal(macam saya)
Title translation:
Howto Sync Calendar: Mobile + Google Calendar + Outlook(Office Calendar) + iCal(like me)
Semasa di pejabat (At office hour), saya menggunakan Ms Outlook dan saya pasti ramai menggunakannya, untuk kegunaan kerja2 harian yang tak habis di pejabat. Yang pasti saya nak Outlook Calendar sync dengan Google Calendar; tujuan= supaya saya boleh lihat calendar di luar waktu pejabat. Saya gunakan Google Calendar Sync(Windows);
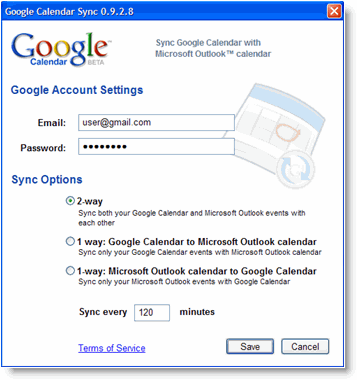
Dapatkannya di sini.
Apabila balik dari kerja (after office hour), jumpa kawan2 di kedai kopi; 5 temujanji di buat (yup, lima... banyaknya. Popularnya aku!!). Dengan guna phone Nokia S60> Calendar, aku catat temujanji. Secara tak langsung, calendar phone aku telah sync dengan Google Calendar. Nasib baik aku ada Goosync, auto update Calendar mobile <-> Google Calendar. Macamana aku buat;


Settings>Sync (manual Sync)
Kalau nak auto Sync, jangan lupa install Swim sekali. Swim autoupdate Sync 15m, 30m > 12jam.

Pst: Ada juga yg pakai nuevasync, plaxo, CalSyncS60 & dll
Pst: Untuk pengguna phone WindowMobile, anda bole pakai Oggsync & dll
Sampai di rumah (at home), aku buka MacPro aku untuk melayari internet dan chit-chat dengan kawan2 di perantauan (selalunya buang masa di Youtube.com.. hehehe). Mak aku call suruh balik kampung, ada 5 kenduri kawin hujung minggu ni(huh, sabtu & ahad, ada 5 kenduri... :-( ). Buka iCal, terus update calendar. Macammana?? iCal > Preference > Accounts > +. Masukkan Gmail username& password, di Acc. Url = https://www.google.com/calendar/dav/yourusername@gmail.com/user


So, selesai kitaran Calendar aku; kerja +lepas kerja +di rumah. Jika anda perasan, Google Calendar adalah Master Calendar dan jika anda suka buka browser, anda hanya perlu layari http://www.google.com/calendar.
Sekian.
Howto Sync Calendar: Mobile + Google Calendar + Outlook(Office Calendar) + iCal(like me)
Semasa di pejabat (At office hour), saya menggunakan Ms Outlook dan saya pasti ramai menggunakannya, untuk kegunaan kerja2 harian yang tak habis di pejabat. Yang pasti saya nak Outlook Calendar sync dengan Google Calendar; tujuan= supaya saya boleh lihat calendar di luar waktu pejabat. Saya gunakan Google Calendar Sync(Windows);

Dapatkannya di sini.
Apabila balik dari kerja (after office hour), jumpa kawan2 di kedai kopi; 5 temujanji di buat (yup, lima... banyaknya. Popularnya aku!!). Dengan guna phone Nokia S60> Calendar, aku catat temujanji. Secara tak langsung, calendar phone aku telah sync dengan Google Calendar. Nasib baik aku ada Goosync, auto update Calendar mobile <-> Google Calendar. Macamana aku buat;


Settings>Sync (manual Sync)
Applications> Calendar option
Set the Include in sync option to Yes (set other apps No)
Provide a Remote database name of Calendar
Leave the Synchronisation type set to Normal
Set the Include in sync option to Yes (set other apps No)
Provide a Remote database name of Calendar
Leave the Synchronisation type set to Normal
Connection setting>
Server version: 1.2
Server ID: blank
Data bearer: Internet
Access point: Access Point (Celcom3G/Digi3G)
Host address: https://sync.goosync.com/
Port: Leave this set to 80 for standard connection or 443 for SSL connections
User name: Set this to your GooSync username
Password: Set this to your GooSync password
Allow sync requests: Yes
Accept all sync reqs.: No
Network authentic.: No
Server version: 1.2
Server ID: blank
Data bearer: Internet
Access point: Access Point (Celcom3G/Digi3G)
Host address: https://sync.goosync.com/
Port: Leave this set to 80 for standard connection or 443 for SSL connections
User name: Set this to your GooSync username
Password: Set this to your GooSync password
Allow sync requests: Yes
Accept all sync reqs.: No
Network authentic.: No
Kalau nak auto Sync, jangan lupa install Swim sekali. Swim autoupdate Sync 15m, 30m > 12jam.

Pst: Ada juga yg pakai nuevasync, plaxo, CalSyncS60 & dll
Pst: Untuk pengguna phone WindowMobile, anda bole pakai Oggsync & dll
Sampai di rumah (at home), aku buka MacPro aku untuk melayari internet dan chit-chat dengan kawan2 di perantauan (selalunya buang masa di Youtube.com.. hehehe). Mak aku call suruh balik kampung, ada 5 kenduri kawin hujung minggu ni(huh, sabtu & ahad, ada 5 kenduri... :-( ). Buka iCal, terus update calendar. Macammana?? iCal > Preference > Accounts > +. Masukkan Gmail username& password, di Acc. Url = https://www.google.com/calendar/dav/yourusername@gmail.com/user


So, selesai kitaran Calendar aku; kerja +lepas kerja +di rumah. Jika anda perasan, Google Calendar adalah Master Calendar dan jika anda suka buka browser, anda hanya perlu layari http://www.google.com/calendar.
Sekian.
Blogged with the Flock Browser
feed me! hello.igetconnection.com
Posted by
Unknown
2:39 PM
0
comments
Labels: mobileical
MSI Wind U100 hack using OSX

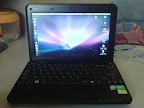
I've been busy lately with working, but I've try to squeeze my time to hack my lovely MSI Wind to run OSX. And its run awesome, and I called little 'windtosh' as mini Macbook Air. Here some screenshot of my mini Macbook Air;

But this MSI Wind not 100% fully compatible with OSX, Wifi + Earphone &MiC are not working. But I manage to get mini pci-e wifi card (dell 1394) & wifi working perfect. For those wanna hack their MSI Wind, you can find good guidance from below link.
http://www.msiwind.net/
http://wind-osx86.wikispaces.com/
http://windosx.wikispaces.com/
Now, you can get MSI Wind $349 at Best Buy. That's include WinXP. Introduction video of Mini Macbook Air;
Posted by
Unknown
12:07 PM
0
comments
How to Hack S60 Phone
Thenokiablog.com produce easy step by step to hack nokia s60 phone:
- Install freeware X-plore, a file manager from Lonely Cat Games. Run X-Plore, press 0 and check first 4 boxes. Don’t exit.
- Install and run HelloCarbide by FCA00000.
- Switch to X-plore and check if you can see the contents of C:/sys/.
If you can, then you are halfway done. If not, try step 2 again. - Download CapsOnOff.rar by FCA00000.
- Copy CProfDriver_SISX.ldd from RAR downloaded above into C:\sys\bin of your phone. You can do this with X-Plore.
- Install CapsOn.sisx and CapsOff.sisx. Run CapsOff application to turn on the hack.
- Download SIS installer mod for Symbian 9.2 and copy installserver.exe file to c:\sys\bin\ so you can install unsigned applications
- Install ROMPatcher by Zorn.
- Whenever you need to install an unsigned application or patch your
phone, just run the CapsOff application first. CapsOn brings it back to
normal state.
Posted by
Unknown
10:32 AM
0
comments
'how do i photograph...'???

Get your tips there; I love to read those information come with pic & video. My favorite is '11 tips for better Candid Photography', because I like taking pic without flash. For expert view, I always get Joe McNally blog:

For editing, I'm using Adobe Lightroom and my favorite blog is 'lightroom killer tips' with 'Matt Kloskowski'.

Posted by
Unknown
11:11 AM
0
comments
www.igetconnection.com

I just release my new biz page, please feel free to stopping-by. Why I create this business? I believe many people out there need this kind of service, but normally we hear;
"Expensive la! No budget la..."
"No need la, my phone enough already..."
"Don't know where to start"
"That's only for IT business..."
"Expertise tarak..."
It's simple solution to put your company name in WWW space (also with your name, put it in your name card). Let us do for you. It's a vital step to your company growth. I'm not promise you that, but I promise you that your future customer only ain't from your neighbor but maybe from other country...
Cheers.
Posted by
Unknown
9:54 PM
0
comments
Subscribe to:
Posts (Atom)